Damon's Home Page
![]()
| Home |
| Journal |
| Pictures |
| Bio |
| Musings |
| Things |
| Miscellany |
| About |
| BWAS-Cam |
| Party-Cam |
| Old stuff |
![]()
In January of 2003, quite by accident I discovered the Mini-ITX website. I was instantly drawn to the variety of projects and implementations. I was excited. I knew I wanted to build something. I knew it was going to be cool.
Of course, it had to be a Power Puff Girls lunchbox. The Batman lunchbox described on the web site looks very cool, and so I was absolutely convinced that I had to do the same thing to a PPG lunchbox. First step, of course, was to order the board and some RAM.
I ordered the VIU EPIA All In One Motherboard and a 128MB RAM module. That came to just over US$200 including shipping. And five days later they were in my hands.
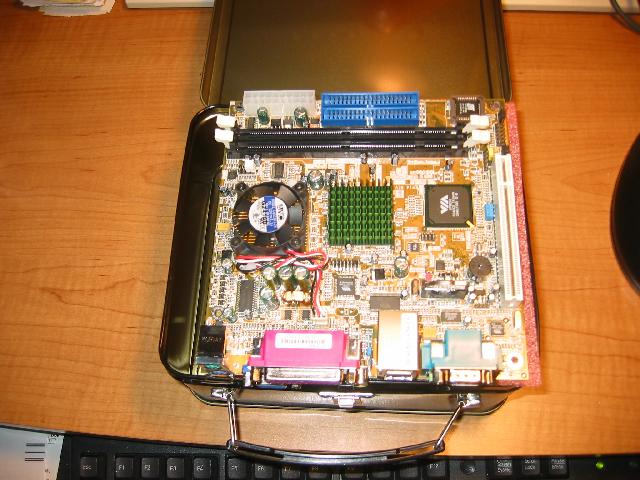
The first test was to see if the board would fit inside my The Evil Dead lunchbox, which is typical size for most novelty lunchboxes available in the US.
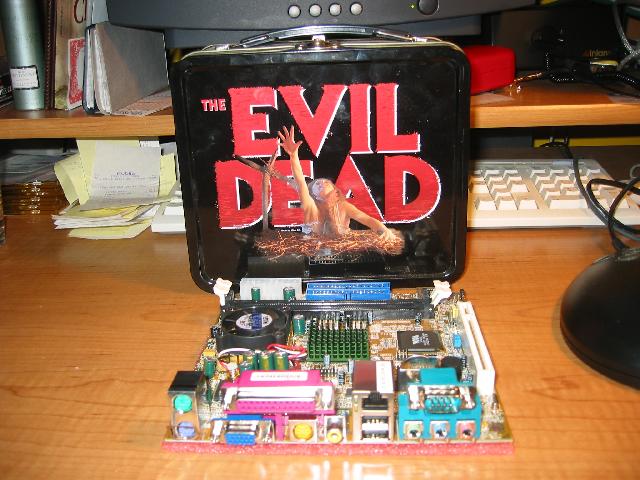
Unfortunately, this test failed.
So I am now tasked with finding a larger sized PPG lunchbox. At the suggestion of Lindsay, I checked on Lunchbox.com but they did not have a metal PPG lunch box. They had a soft one of the right size, so I ordered that anyway.
A power supply shall be obtained from here. I'm not going to have a permanently installed CD-ROM, but I will buy one to use for the installation process. I have a spare 9GB hard drive which I will use as the main drive. I have a wireless keyboard and mouse especially for the project. I expect I should be able to purchase everything else I need (power supply, CD-ROM) for under $100. I will need to get a tool to do the metal work on the lunch box (once acquired). That might be a bit more expensive. But I plan on the whole project costing under US$350.
Now some of you might be wondering what I plan on doing with this project when I complete it. Simple, really. It's going to be a multimedia entertainment box. I will use it to stream my many mp3s, to play computer games (woo MAME), and maybe other fun things that haven't yet come to mind. Don't be surprised if a webcam pops up there.
Progress pics to come soon...
Success!! I have located and ordered a suitably sized metal Powerpuff Girls lunchbox! The excitement continues...
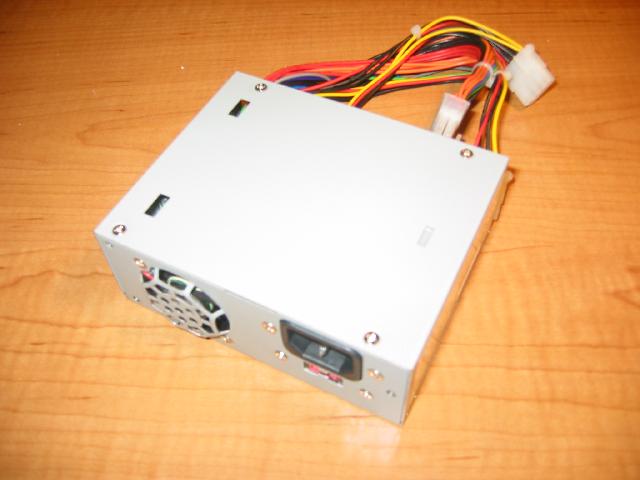
I also went ahead and ordered a power supply that will fit in the box, and drew up a rough sketch plan. Things are coming together nicely.
February 20, 2003
The power supply arrived today.
The lunchbox arrived today.


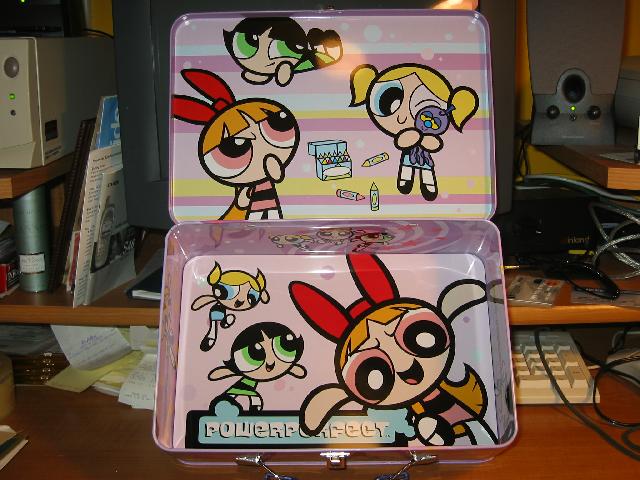
And everything fits in very nicely.
Now I need to buy the right tools to cut the holes for the connectors. I also need to acquire the right connectors to attach power and drive LEDs and, of course, the power switch. I think that I might mount the power switch inside the box, to reduce the chance of it being accidentally hit. I'll also need to acquire a CD-ROM drive for the purpose of loading the operating system. The excitement continues...
(later...)
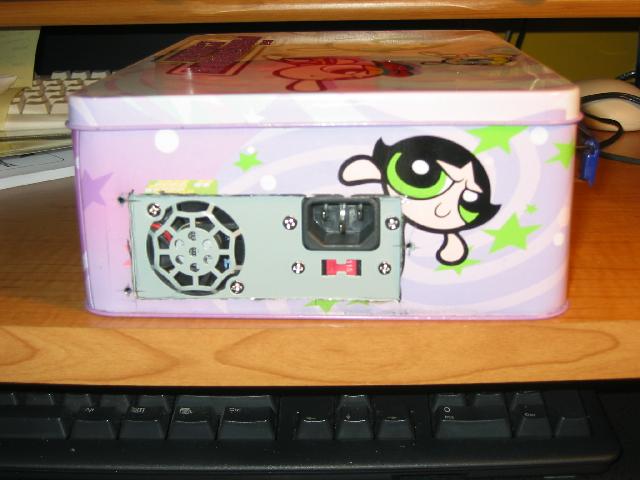
I went out and spent a wad of cash on tools to continue the project. As of 19:10EST, holes have been drilled for the power supply (plug and fan output) and the connectors on the ITX board. My skills with the dremell aren't refined yet, so some of the holes are a little rough, but I think we'll be okay.

Tomorrow I need to buy some screws to fix the power supply in place, and some risers (and some way of affixing them) to keep the mini-ITX board in place and raised, and a CD-ROM drive to load the system with. The last key thing that I haven't really considered yet it the location of the power switch and the power and drive lights. I'm thinking that I'll mount the power switch inside the case. I think, for the time being, that I'll do that also with the LEDs; I can always move them somewhere else later.
First stop was Radio Shack, where I bought insulated mounting standards for the motherboard, and a couple of LEDs. Next stop was CompUSA where I picked up mounting screws and a CD-ROM drive. I was unable to obtain a connector for connecting the power button or LEDs. Then I remembered that Sarah had a computer at our place that didn't work. So I called her and she generously let me scavenge what I wanted from it.
So, home again, and the first task was drill out holes for the mounting stands. This was 75% successful: on the first hole, I slipped and made a much larger hole than I desired. Bugger. I'm not sure what I'm going to sort that out, but the other three holes worked perfectly. I also drilled out the holes for mounting the power supply.
Then it was time to see what could be scavenged from Sarah's PC. First, there was a CD-ROM drive. Excellent, if I can get this to work, then I can either return or sell the CD-ROM I just bought. I also was able to scavenge a suitable connector for running from the motherboard to the power switch I'm going to use. The other connectors are going to take a little work to get at, so I decided to leave them.
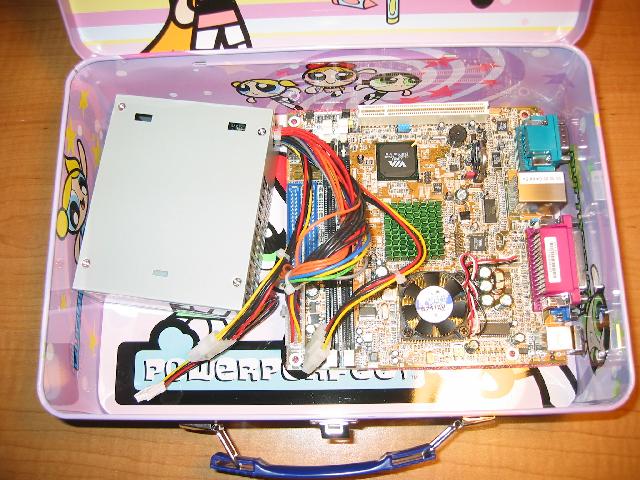
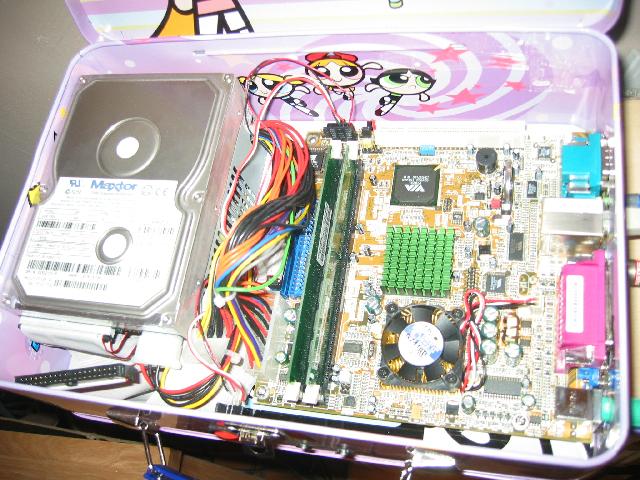
Now it was time to advance the testing. I mounted the power supply and motherboard. I installed the memory and connected the hard drive and CD-ROM to the power supply and motherboard. I soldered my power switch to the scavenged connector and leads and plugged it into the board. Now it was time to really test this puppy...
I plugged the keyboard from my server and a spare mouse, my monitor, a network cable, and then the power. Hold breath and press the power switch. Woohoo!! Everything burst into life! Time to set the BIOS settings and then load the operating system.
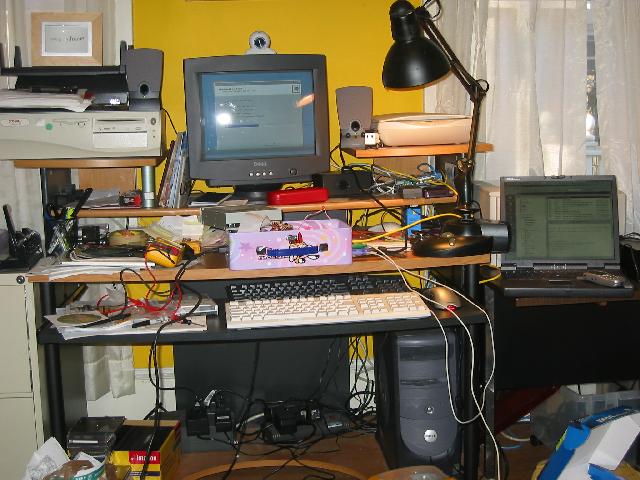
Once the operating system and the drivers and VNC were installed, I relocated the project to the living room and connected it up with audio and video feeding into the VCR (long term, they will feed directly into the amp, but I'm just getting everything set up, and, well, the TV is a bitch to move). Alas, video didn't kick on. Via VNC I confirmed that the wireless keyboard and mouse are working and I reviewed the manual again. It turns out that I had missed a jumper setting, so I powered everything down, changed the jumper and turned everything on again. Voila! I watched the system boot on my 32" television.
The network was present, so I ran a multimedia test. Windows Media Player successfully blasted out a couple of mp3s from from server, and also played Emma Bunton What Took You So Long music video mpeg at full screen perfectly. Rock!!! I installed Real One, and this also played the audio awesomely, but had some problems with the mpg videos. Looks to be a video buffering issue - I will need to up the RAM from 128MB to 256MB.
Next test was MAME, and this worked suitably for my requirements, although I suspect upping the RAM will help that out, too. I think I'll throw on my C64 emulator as well later on.
Tomorrow I will drill holes for the hard drive mounting screws and determine how I'm going to mount the power button and the power and hard drive LEDs. This has been such a fun project!
Work got slightly in the way of getting things finished, but it also provided me with some of the finishing touches - motherboard connectors for the power button and the LEDs.
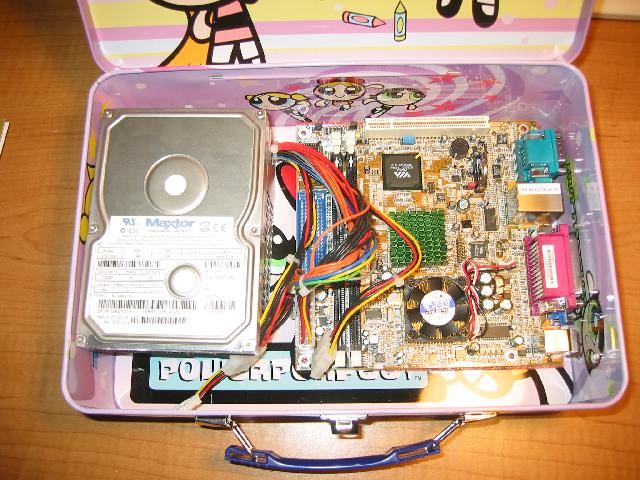
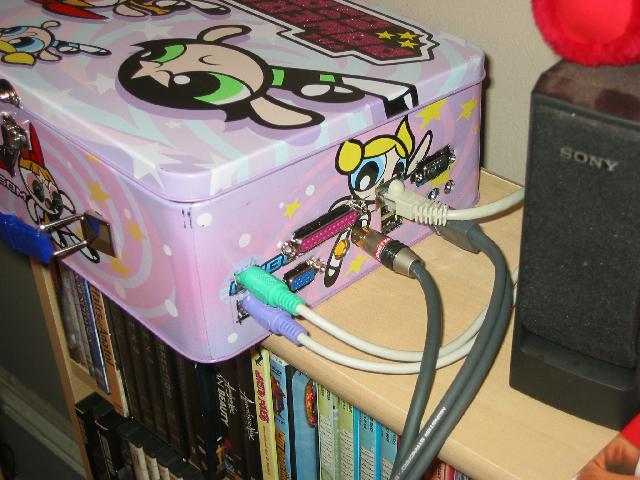
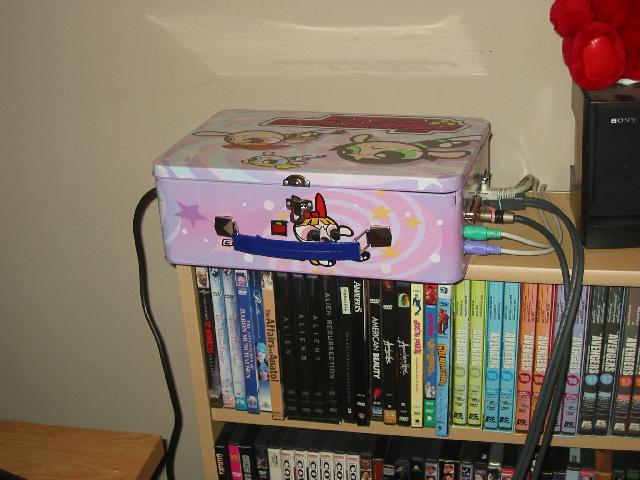
So when I got home I measured up the location of the screwholes on the hard drive and determined their placement on the side of the box. I also decided to place the power button under the handle, and to put two drive LEDs in rather than one. Why two? Well, one for each of Blossom's eyes, of course.
I got set drilling out the final holes and was done as the sun went down. My dremel bits are somewhat worn now - I'll need to be replacing some for whatever project comes next. But the box is in good shape (well, aside from that one big hole where a mounting stand should be; oh well).
I loaded everything back into the box and fired up and everything was still working. Yippee!! The next step was to solder up the connectors for the power switch and power LED - an easy task. The harder part was making sure I had the correct polarity in the connector to the motherboard. This was an easy test and I only had to rewire the connector once :-).
Then I tried to plug both the drive LED/power switch connector and the power LED connector onto the motherboard and they wouldn't fit together. Damnit. So it was quick temporary fix time, and I was able to plug in the power button and the power LEDs. The drive LEDs will have to wait until tomorrow.
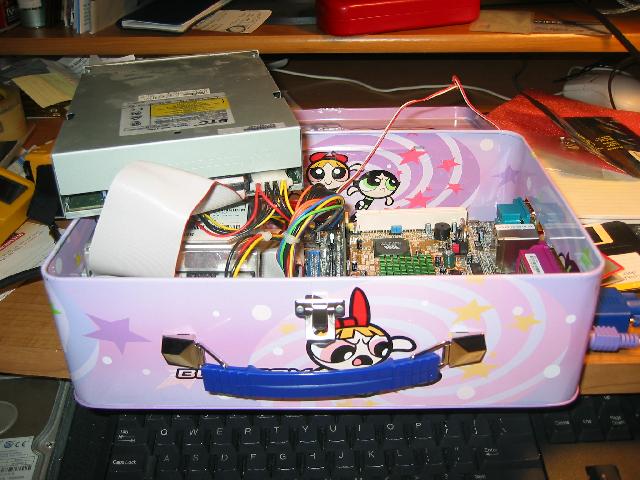
Now was the time to throw in the other 128MB stick that I had a fire everything up. Success!! And wouldn't you know it, that 128MB stick actually appears to be a 256MB stick!
 />
/>  />
/>
Back the software testing, and I had to tweak the settings of Real One to get the video player to work smoothly, but work it does. I now have a computer in a Powerpuff Girls lunchbox - a Powerpuff PC!
| Mini-ITX board + 256MB RAM | 203.56 |
| Power supply | 35.21 |
| Lunchbox | 24.94 |
| Screws, stand-offs | 2.98 |
| Wireless keyboard | 25.63 |
| Disk drive, CD-ROM, Power switch | 0.00 |
| Total | 292.32 |
© BoyWithoutASoul.com. All rights reserved. Unauthorized use of any material on this site is a violation of applicable laws.
| Home |
| LiveJournal |
| MySpace |
| Last.fm |
| Tim |
| Rosalie |
| Joe |
| Jolie |
| Jennifer M |
| Sister Louisa |
| LooseCrew |
| The Local |
| Brewhouse |
| The Midway Pub |
| The Highlander |
| Drunken Unicorn |
| MJQ |
| EARL |
| Smith's |
| Variety Playhouse |
| Masquerade |
| Occidental |
| 95bFM |
| Liverpool FC |
| This Is Anfield |
| All Blacks |
| Hurricanes |
| Lions |
| Falcons |
| Braves |
| Thrashers |
| Silverbacks |
| Rollergirls |